
Building & Testing Advanced Version of PANOPTES at EPFL
Origin of the project
The PANOPTES project aims to make it affordable and accessible for anyone to build a robotic telescope capable of detecting exoplanet transits.
The student association Callista was contacted by Astropléiades, a Swiss astronomy organization, with the goal of installing a telescope as part of their educational astronomy trail near Vevey (Switzerland), funded by astronaut Claude Nicollier.
From there, we began researching the necessary components and exploring how to implement a new version of PANOPTES with our team at EPFL.
Telescope Installation
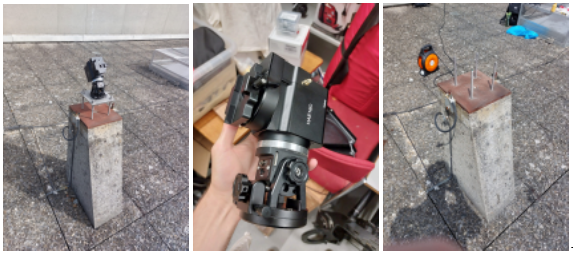
Our first step was to determine where and how to mount the telescope on campus. We chose the Cubotron, one of the tallest buildings at EPFL, which provided an ideal location for our initial tests before the telescope’s final installation at Astropléiades.
For the mount, we used the iOptron HAE 16C model, the selected model for this new version of PANOPTES. It was installed on one of the rooftop pylons, allowing the telescope’s “head” to be securely attached and remotely controlled to observe different areas of the sky.
To do this, we designed and manufactured a custom adapter plate to firmly attach the mount to the pylon.
Images: iOptron HAE 16C mount → Mounting pylon (with and without the mount)
Component Selection and Design
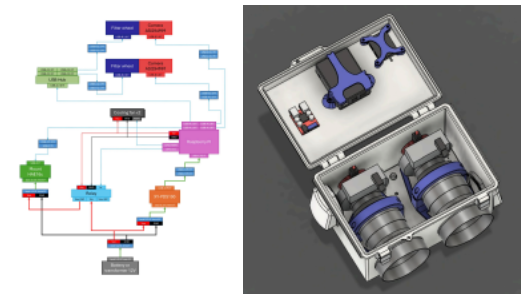
For waterproofing reasons, the optical and electronic parts of the telescope are housed in a sealed enclosure. We did not need to build it ourselves, as we found commercially available boxes with the exact dimensions we required.
In parallel, we ordered the necessary hardware to continue the telescope’s design:
● 2 ZWO ASI294MM cameras : for image capture
● 2 ZWO LRGB 1.25″ filter wheels : to obtain color images
● 2 Canon-T2 adapters : to connect the cameras to the lenses
● 2 Rokinon SP 85 mm f/1.2 lenses
● 1 Raspberry Pi 5 : to control all the electronics in the camera box
To keep all components securely in place inside the telescope, we 3D-printed custom mounts for each part.
Images: 3D-printed Raspberry Pi mount → 3D-printed lens holder

We also created a wiring diagram to anticipate the upcoming assembly and modeled all internal components in Fusion 360 to ensure perfect integration inside the enclosure.
Images: 3D-printed supports for the Raspberry Pi, lenses, etc. → Wiring diagram
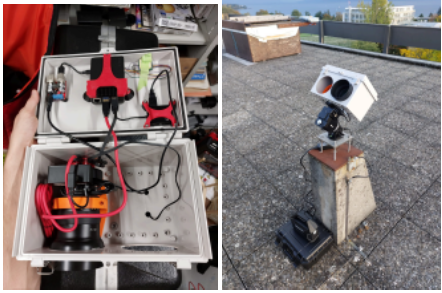
Preliminary Tests
Since delivery of the enclosure was delayed, we conducted several tests using laser-cut wooden plates with the same dimensions as the final box.
Image: Full prototype setup with one of the two lenses and all electronics mounted on a wooden plate
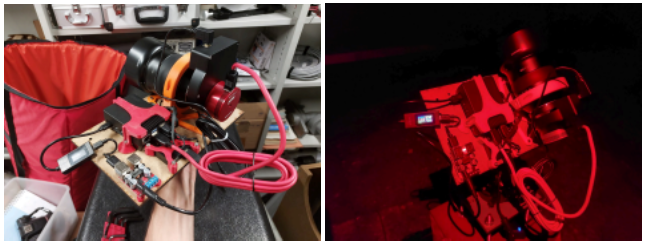
Using this setup, we captured our first image of the Andromeda Galaxy, with a single lens and computer-controlled operation.
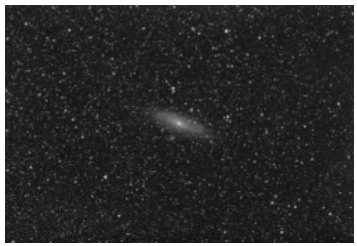
Later, we took new photos of the same galaxy, this time using RGB filters, allowing us to produce beautiful color images!
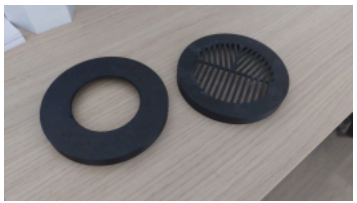
As the first images showed significant optical aberrations, we considered reducing the aperture to improve quality, but that wasn’t possible with our lenses.
We are currently testing different masks on the lens hoods, one to reduce the aperture (left on the photo) and a Bahtinov mask (right on the photo) to help with focusing.
Current Version!
We finally received the enclosure, drilled openings for the lenses using a hole saw, mounted all electronics inside, and connected everything to our mount resulting in our current version of PANOPTES!
What’s Next?
We still have a few key steps before reaching the final version of the telescope, and we’ve already planned our next objectives:
● Camera Box: Fix the mount waterproofing issue, improve the Raspberry Pi setup, and test the enclosure’s ventilation.
● Battery Box (backup power): Confirm the wiring diagram and components.
→ Still to be ordered: sensors + ESP32 to alert the Raspberry Pi in case of a power outage. ● Weather Station: Design a small weather station to remotely control PANOPTES based on weather conditions.
● Software: Update the current PANOPTES software for better compatibility and improved automation.
We look forward to collaborating with you!
